


Transformコンポーネントとは
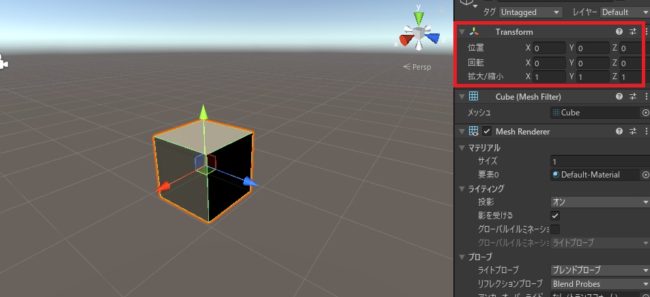
すべてのゲームオブジェクトはTransformコンポーネントを持ち、オブジェクトの位置、回転、拡大/縮小を数値で指定することができます。
位置(Position)でオブジェクトの配置位置、
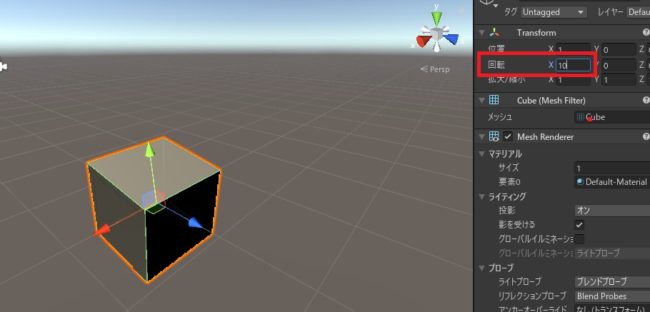
回転(Rotation)でオブジェクトの回転具合(x軸を中心に横回転、360で一回転)、
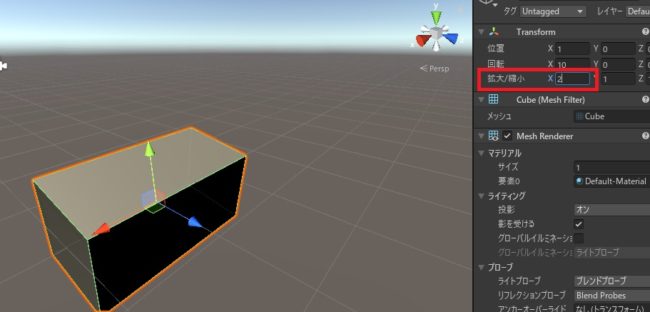
拡大/縮小(Scale)でオブジェクトのサイズを変更できます。
x軸とy軸はそれぞれ横軸と縦軸、
z軸は奥行きを意味します。
位置(Position)
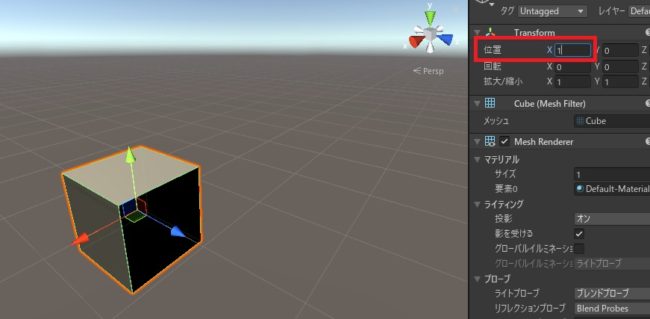
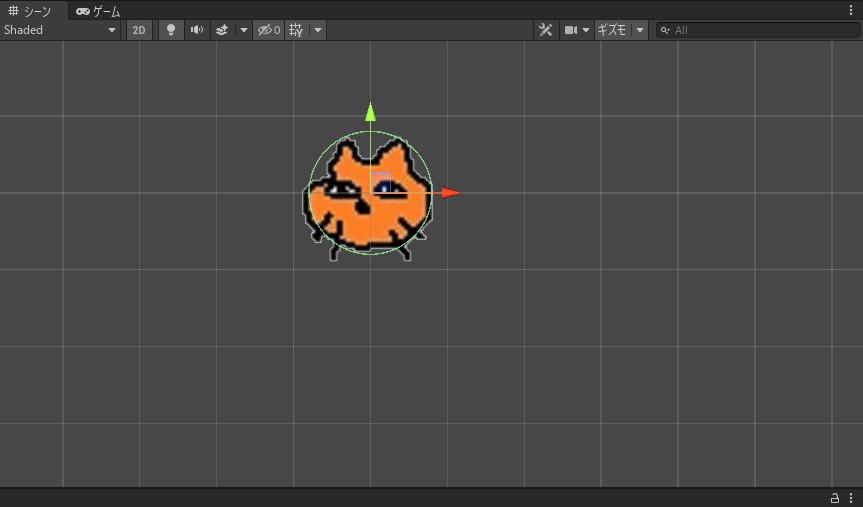
実際にオブジェクトの位置を変更してみましょう。まずは2Dの場合。
グリッドの上にオブジェクトがひとつだけ置かれている状態で、位置はxyzすべて0に設定してあります。
グリッドの上にオブジェクトがひとつだけ置かれている状態で、位置はxyzすべて0に設定してあります。

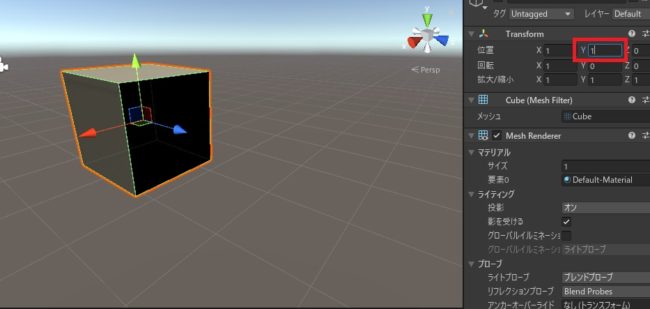
オブジェクトを選択してインスペクターを表示し、位置のxを0から1に変更すると、
背景の目盛り(グリッド)ひとつ分だけ、オブジェクトが右に動くことが確認できます。

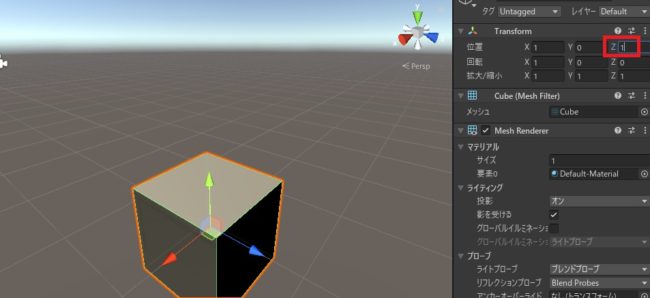
同様に位置のyを0から1に変更してみます。
オブジェクトが目盛りひとつ分上に移動しました。
このように、2Dゲームではxが増えれば右、yが増えれば上にオブジェクトが移動します。
また、数字1につき目盛りひとつ分の距離を意味します。小数も指定可能です。
このように、2Dゲームではxが増えれば右、yが増えれば上にオブジェクトが移動します。
また、数字1につき目盛りひとつ分の距離を意味します。小数も指定可能です。
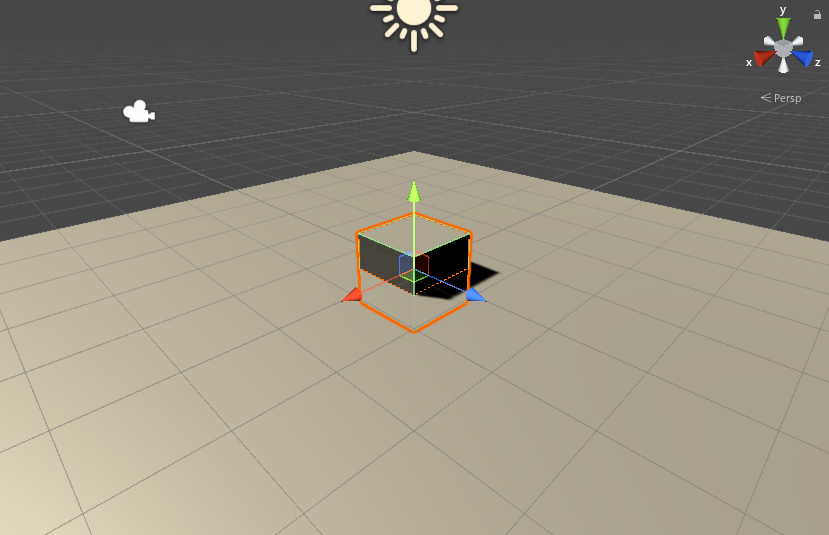
3Dの場合も同様ですが、xが右か左か奥行きかはカメラの位置によります。xを1増やせば、
x軸の方向に1目盛り分動きます。y軸は上下となります。
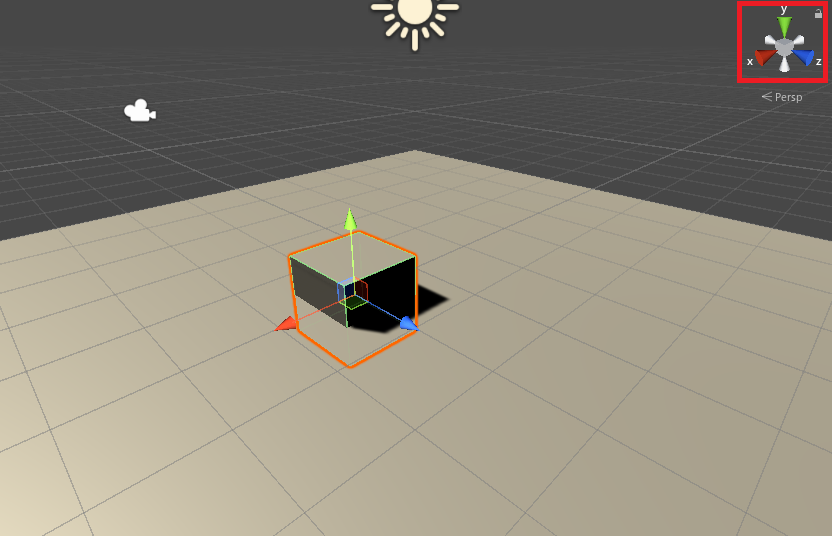
軸の方向は右上のギズモで確認することができます。
軸の方向は右上のギズモで確認することができます。
スクリプトで位置変更(transform.Translate)
オブジェクトを移動する
オブジェクト.transform.Translate(x, y, z);
オブジェクト.transform.Translate(x, y, z);

スクリプトでオブジェクトを「移動」させる場合、transform.Translateを使います。
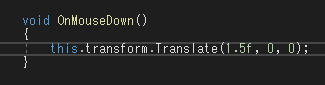
//Unity C#
//マウスクリック時に実行
void OnMouseDown()
{
//x方向に1移動
//(数字はそれぞれx,y,z)
this.transform.Translate(1, 0, 0);
}
コードとしてはこのようになり、

実行するとクリックしたオブジェクトがx方向に1動きます。
//Unity C#
        this.transform.Translate(1.5, 0, 0);
ただし、transform.Translateの値に直接小数を入力はできません。整数の場合は省略できますが、transformの値はfloat値で指定する必要があり、float値であることを示すためには後ろにfを付ける必要があります(fを付けない小数はdoubleという型の扱いになる)。
this.transform.Translate(1.5f, 0, 0);のように、数字の最後にfを付ければエラーが起きず、1.5目盛り動きます。
スクリプトでなく、インスペクターのTransformコンポーネントで直接小数を入力する時は、fを付ける必要はありません。
スクリプトでなく、インスペクターのTransformコンポーネントで直接小数を入力する時は、fを付ける必要はありません。
スクリプトで位置取得(transform.position)
//Unity C#

Debug.Log(this.transform.position);transform.positionを使用すると、オブジェクトの現在位置が取得できます。
実際に実行すると、
実際に実行すると、
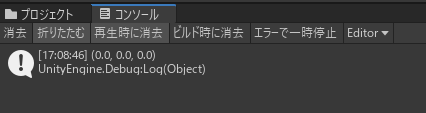
こんな具合でx,y,zがそれぞれ出力されます。
transform.positionは3つの数字の集合体(構造体)であり、ひとつの数値では表せないため、縦横奥の値を組み合わせたVector3構造体という型で取得されます。
transform.positionは3つの数字の集合体(構造体)であり、ひとつの数値では表せないため、縦横奥の値を組み合わせたVector3構造体という型で取得されます。
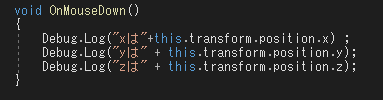
transform.x、transform.yのように指定すると、3つの値のひとつだけを取り出すことができます。
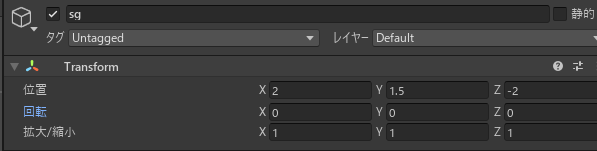
全部0だと正しいかわからないので、少しオブジェクトの位置を変えて、
実行すると、xyzがそれぞれ取得できていることが確認できます。

やりたいことから逆引きするUNITYの使い方まとめ
Unityをやりたいことから学習していけるよう、機能・用途別にまとめたページです。C#の命令別の逆引きは現時点で作っていません。2019の時期に書き始めているので、それより前のバージョンについては言及しません。
sunagitsune.com
2021.07.09


コメント