


リストボックスでは、データをリストとして一覧表示し、その中から必要な項目を選択・参照することができます。
リストボックスの作成

コンボボックスを使用するには、開発タブが表示されている必要があります。
リンク先で設定方法を解説しています。
リンク先で設定方法を解説しています。
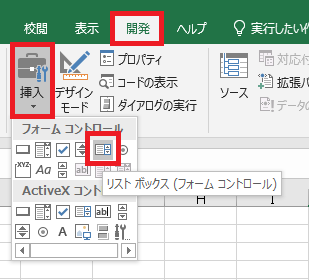
開発タブの挿入→リストボックス(フォームコントロール)をクリックします。
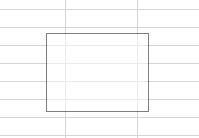
好きな位置でドラッグすると、
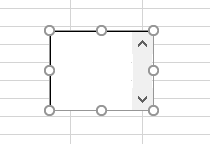
リストボックスが作成されます。
リストボックス外をクリックすると編集モードが解除されます。
リストボックスとセルのリンク
とりあえずリストで何か選択すると、任意のセルに結果が反映されるようにしてみます。
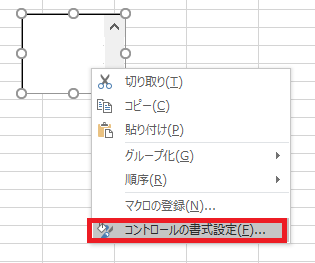
リストボックスを右クリックし、コントロールの書式設定をクリックします。
リストボックスを右クリックし、コントロールの書式設定をクリックします。
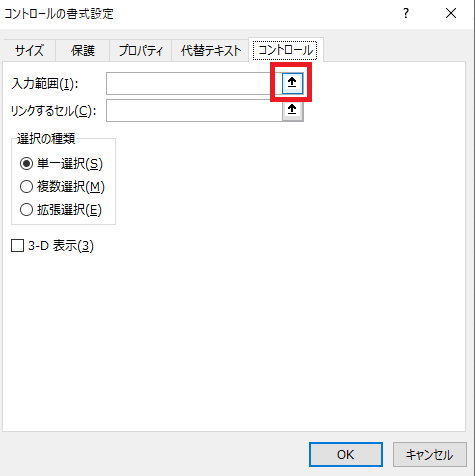
入力範囲右のボタンをクリックし、
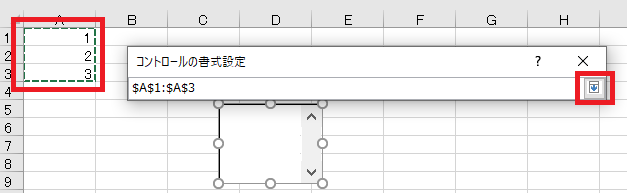
リスト化したい範囲を選択します。直接記入も可です。
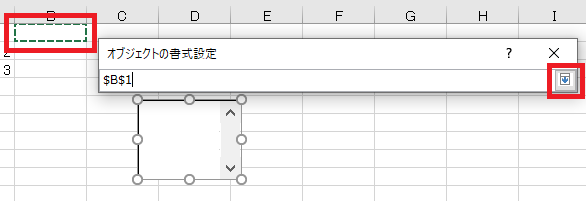
同様にリンクするセルには結果を出力したいセルを指定し、
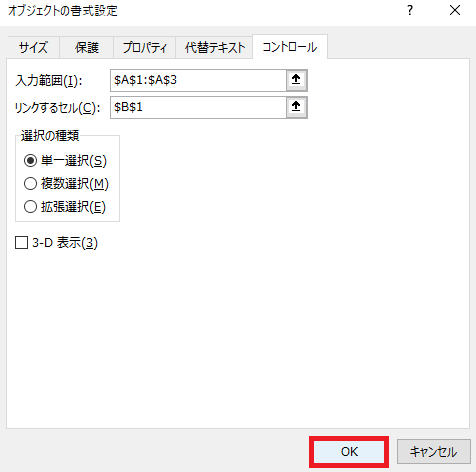
OKを押します。
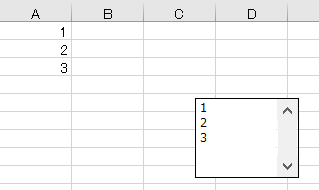
リストに指定範囲の値が反映され、
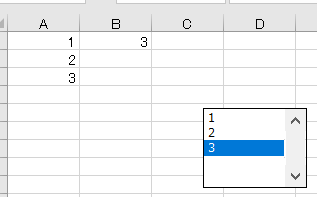
リスト内の値を選択するとリンクするセルに値が反映されるようになりました。
リストボックスの編集
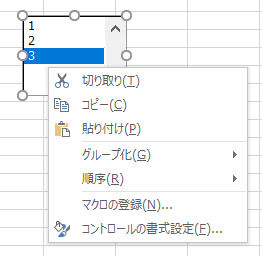
リストボックスを右クリックするとメニューが表示され、
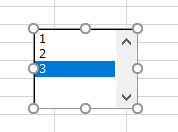
もう一回クリックで編集モードになります。
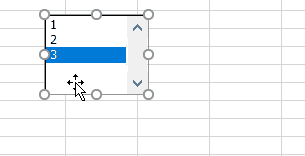
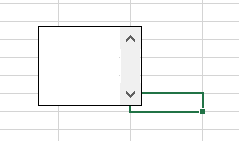
編集モードでドラッグすることでリストボックスの移動、
〇上でドラッグすることでサイズの変更が行えます。
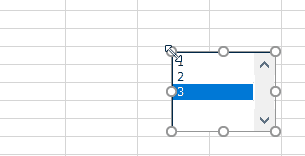
セルにぴったり合わせるにはAltを押しながらサイズ変更/移動、Shiftを押しながら移動で水平・垂直に動かせます。
編集モードでDeleteを押すと、リストボックスが削除されます。

やりたいことから方法を探すエクセル(Excel)操作・関数・VBA(マクロ)逆引きまとめ
逆引き(やりたいことから探す)Excel記事まとめ
sunagitsune.com
2018.11.04


コメント