


Unity UIに用意されているボタンの使い方です。とりあえず作成して、クリックした時に何かイベントを起こすところまでやります。
ボタンの作成
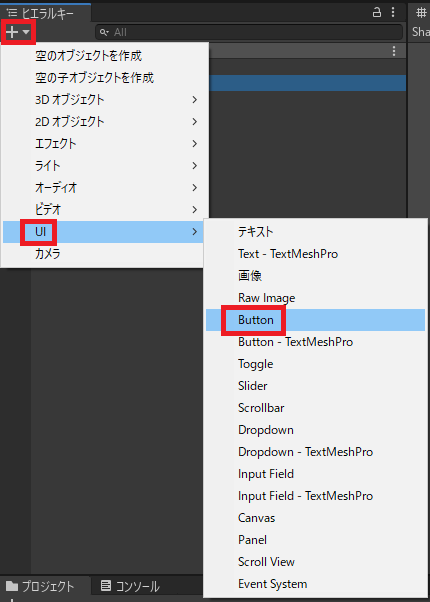
ボタンを作るには、ヒエラルキーの+(Create)→UI→Buttonをクリックします。
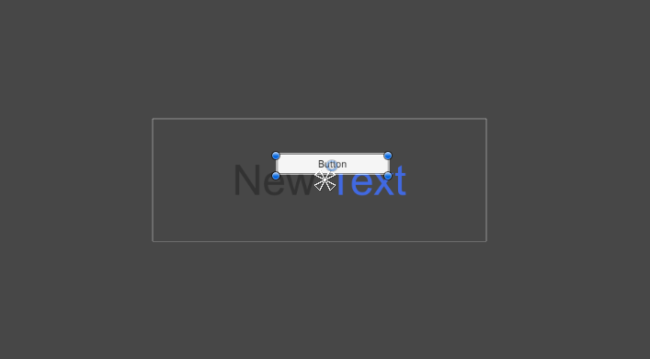
ボタンが画面上に配置されました。
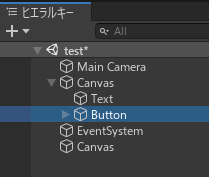
UI要素は必ずCanvasとセットになるので、もしまだ作っていなければCanvasも一緒に作られているはずです。
もし後で書くスクリプトも試してみたい場合、UI→テキストもいっしょに作成して、画面内に配置しておいてください。
キャンバスがデカ過ぎる件についてはこちら参照。
もし後で書くスクリプトも試してみたい場合、UI→テキストもいっしょに作成して、画面内に配置しておいてください。
キャンバスがデカ過ぎる件についてはこちら参照。
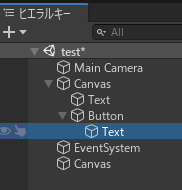
Buttonの子オブジェクトにさらにTextがあり、
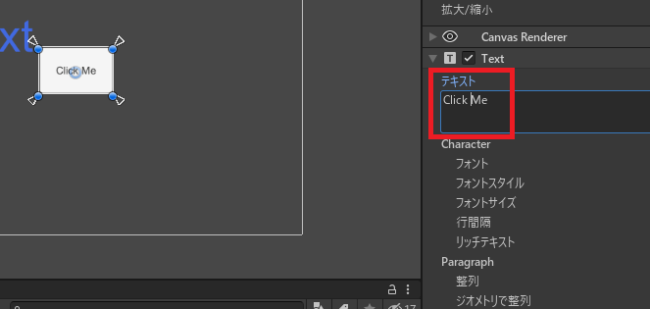
Textのヒエラルキーをいじることで、表示する文字やフォント、色などを変更できます。
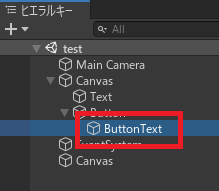
メインのテキストと差別化するために、ちょっと名前を変えておきます。
ボタンを押すとイベント
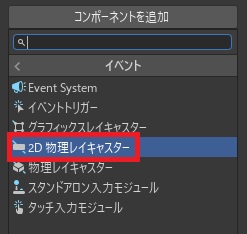
コライダーの追加
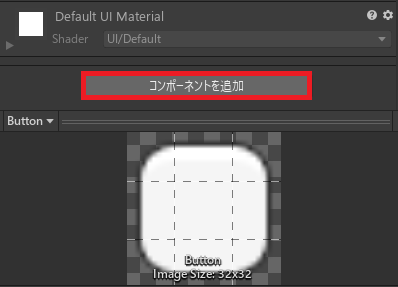
先に当たり判定を作ります。
ボタンのインスペクター最下部でコンポーネントを追加→
ボタンのインスペクター最下部でコンポーネントを追加→
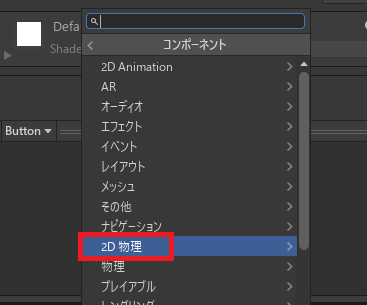
2D物理→
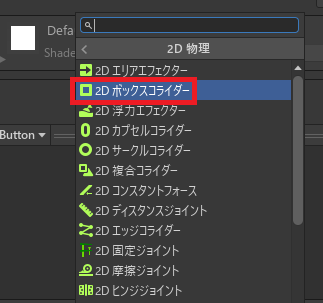
2Dボックスコライダーをクリックします。
イベントトリガーの追加

UIオブジェクトはイベントトリガーという機能を使うことで何かした時にイベントを起こすことができ、この記事ではテキストをクリックするとイベントが起きるようにしています。
なのでこれの引き写しになるんですが、
なのでこれの引き写しになるんですが、
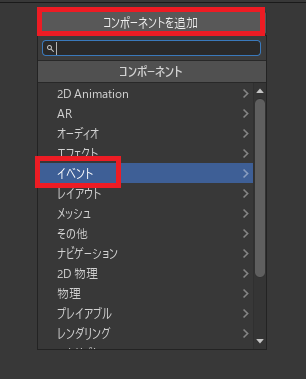
ボタンのインスペクターでコンポーネントの追加→イベント→
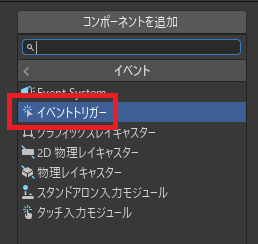
イベントトリガーをクリックします。
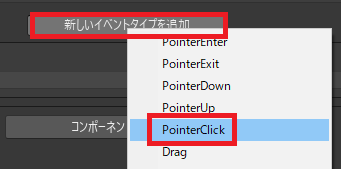
イベントトリガーコンポーネントが追加されたら、新しいイベントタイプを追加→Pointer Clickをクリックします。
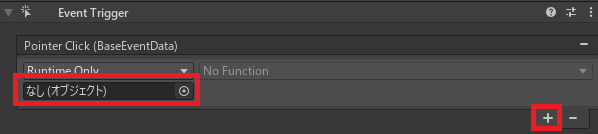
+を押すとオブジェクトが「なし」となっているので、
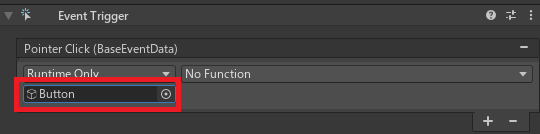
自分自身(Button)をヒエラルキーからドラッグしてきてセットします。
スクリプトの設置
//Unity C#
using UnityEngine.UI;

//好きな名前で
public void ButtonClick()
{
GameObject text = GameObject.Find("Text");
text.GetComponent().text = "Changed!";
}
スクリプトを作成し、public voidの後に好きな名前をつけてメソッドを作り、その中に左記のコードを記述します。
やってることは「Text」という名前のオブジェクトを見付けて、そのテキストを変更するという処理です。これのためにさっきボタンのテキストの名前を変更しました。
やってることは「Text」という名前のオブジェクトを見付けて、そのテキストを変更するという処理です。これのためにさっきボタンのテキストの名前を変更しました。

スクリプトをボタンにアタッチし、
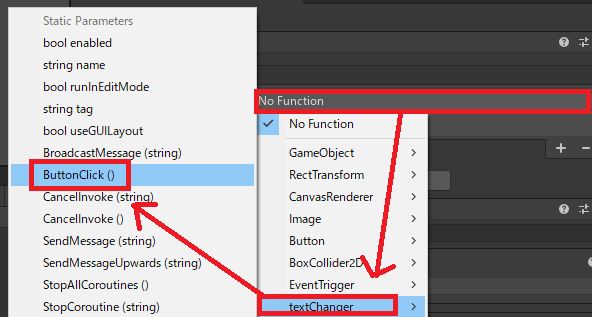
ボタンのイベントトリガーのNo Functionをクリック→作ったクラス名→作ったメソッド名をクリックします。これで大体終わり。
環境準備
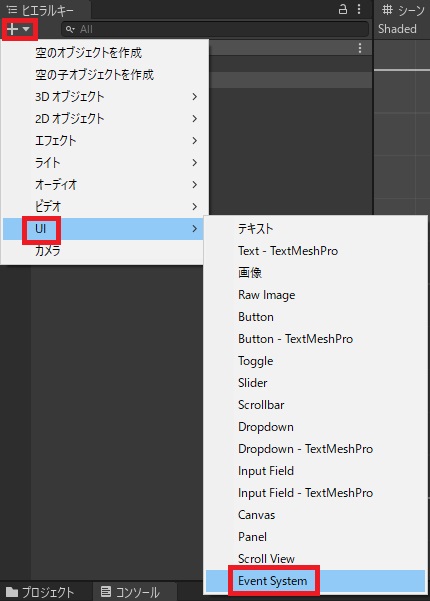
まだ作ってなければ、ヒエラルキーの+(Create)→UI→Event Systemを追加します。
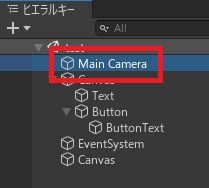
それからMain Cameraをクリックし、

インスペクターでコンポーネントの追加→イベント→
2D物理レイキャスターをクリックします。
完成品
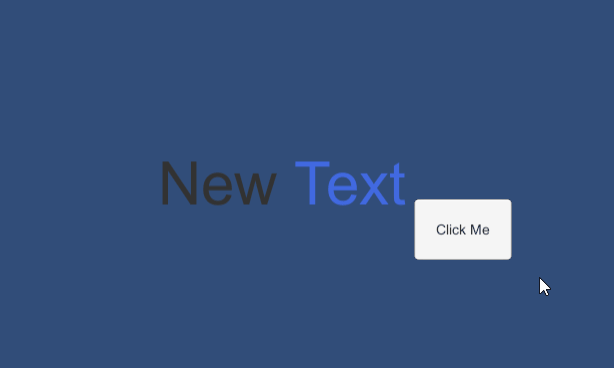
以上の手順を踏むと、「クリックするとテキストを変更するボタン」が作成できます。

やりたいことから逆引きするUNITYの使い方まとめ
Unityをやりたいことから学習していけるよう、機能・用途別にまとめたページです。C#の命令別の逆引きは現時点で作っていません。2019の時期に書き始めているので、それより前のバージョンについては言及しません。
sunagitsune.com
2021.07.09


コメント