


今回はひとつの棚に「上の段」「真ん中の段」「下の段」という別々の当たり判定を作り、押した箇所によって処理を振り分ける、ということをしてみたいと思います。
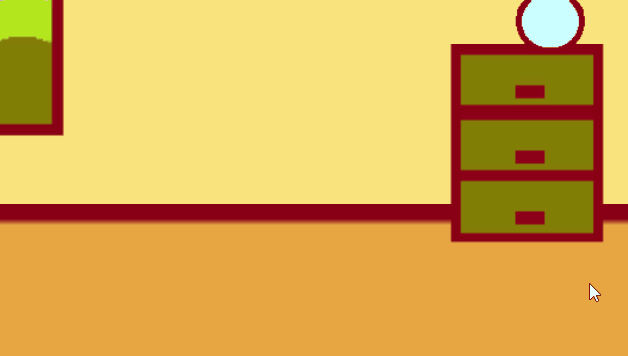
成果物
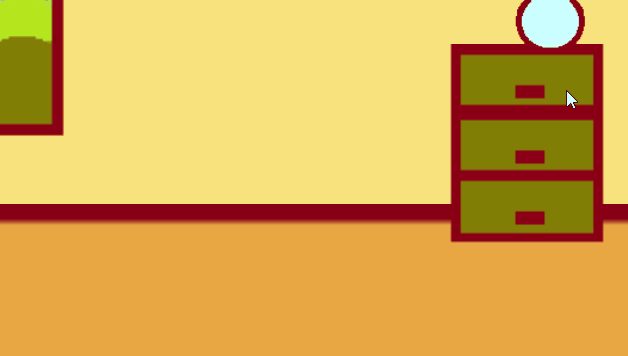
ひとつのオブジェクトの上にふたつの当たり判定を貼り付け、押した箇所で処理を振り分けます。
当たり判定の作成
とりあえず棚と、棚押した時に文字を出すテキストを用意します。
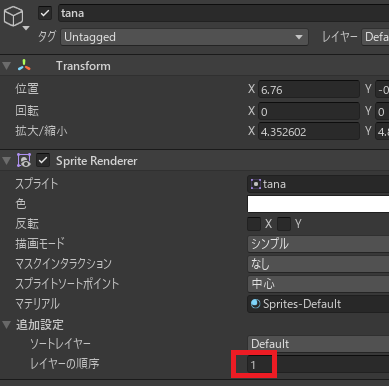
棚はレイヤーの順序を1にして、背景より少し前に出しておきます。
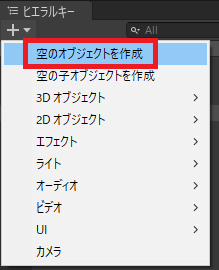
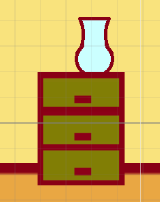
棚の上に貼り付ける当たり判定用に、ヒエラルキーで空のオブジェクトをふたつ作り、
それぞれ適当な名前を付け、コライダーを設置します。
レイヤーの順序と当たり判定の優先順は無関係なので、スプライトレンダラーは不要です。
レイヤーの順序と当たり判定の優先順は無関係なので、スプライトレンダラーは不要です。

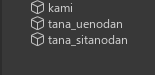
棚、空のオブジェクトの当たり判定1、2のコライダーをそれぞれ引き出しひとつ分のサイズになるよう調節します。
当たり判定の作成はここまで。
当たり判定の作成はここまで。
クリックした箇所で処理を振り分ける
スクリプトを作成し、

スクリプトを棚および空のオブジェクト1、2にアタッチし、インスペクターでそれぞれ文字を表示するテキストをセットします。
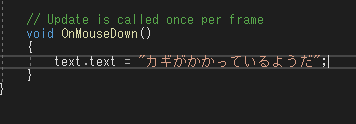
まずはシンプルにテキストを変更する命令を書き、
ちゃんと動くことおよび、文字の画面内での見え方を確認します。
あとはクリックした対象の名前で振り分ければ、
当たり判定ごとの処理を実装できます。
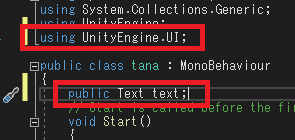
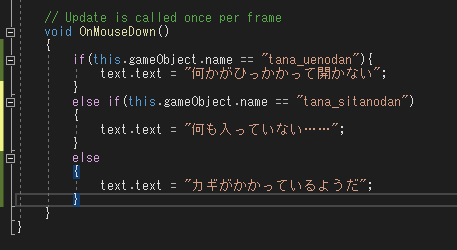
//Unity C#
using UnityEngine.UI;

public class tana : MonoBehaviour
{
    public Text text;

    void OnMouseDown()
    {
        if(this.gameObject.name == "tana_uenodan"){
            text.text = "何かがひっかかって開かない";
        }
        else if(this.gameObject.name == "tana_sitanodan")
        {
            text.text = "何も入っていない……";
        }
    //どちらでもない=真ん中の段
        else
        {
            text.text = "カギがかかっているようだ";
        }
    }
}完成品はこちら。

やりたいことから逆引きするUNITYの使い方まとめ
Unityをやりたいことから学習していけるよう、機能・用途別にまとめたページです。C#の命令別の逆引きは現時点で作っていません。2019の時期に書き始めているので、それより前のバージョンについては言及しません。
sunagitsune.com
2021.07.09


コメント