


Velo by Wixのチュートリアルでも同じことしてますが、テキストをVeloで変更する方法です。
textプロパティで入力できるのはプレーンテキストなので、htmlを入力したい場合は代わりにhtmlプロパティを使用します。

Text | Velo
Sets or gets the plain-text contents of a text element. Setting the text property sets the plain-text contents of
www.wix.com
準備
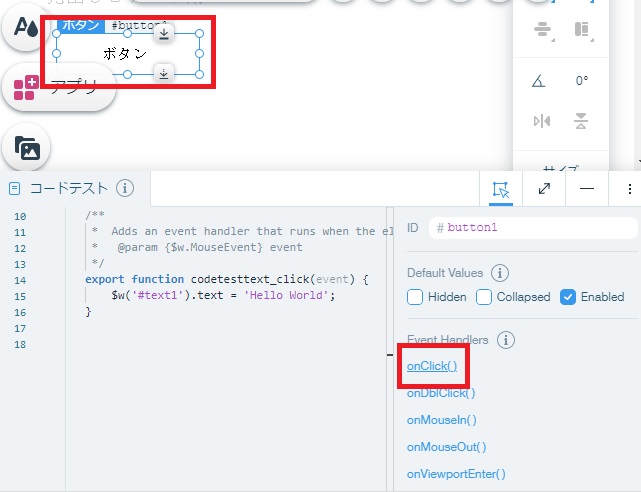
テキストはあるものとして、とりあえず押すためのボタン作ります(テキストを押すこともできます)。
ボタン作ってIDの下にあるonClickをクリックし、
ボタン作ってIDの下にあるonClickをクリックし、
右に何か出るのでもう一回クリックします。
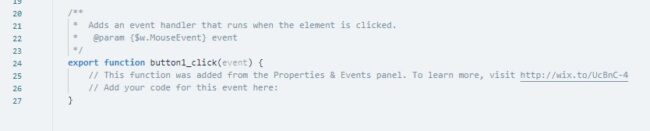
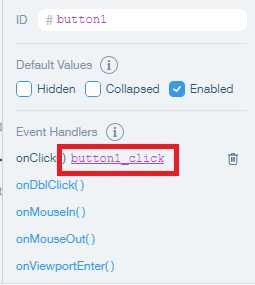
すると自動でイベントハンドラを作ってくれます。あとはここにIDがbutton1のボタンを押したときの挙動を書いていけば動きます。
テキストの変更(textプロパティ)
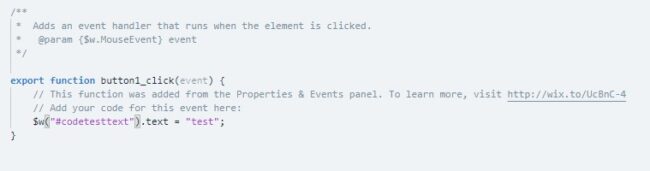
IDが#codetesttextの要素に対し、テキストを変更するということで、$w(“#codetesttext”).text = “test”;をイベントハンドラの中に書きます。

公開後またはプレビューでボタンを押すと、

この通り、IDを指定したテキストの文面が変更されます。

WixおよびVelo by Wixの使い方・関数・プロパティなどまとめ
Wix関連のまとめです。①公式のリファレンスが充実してるのと②Wix自体がまだ発展途上(バグも多い)のと③そこまでガッツリ使うわけではないのと④AdBlock入れてるとまともに動かない ので記事の充実圧力は低めですが、まあぼちぼち暇を見て増...
sunagitsune.com
2021.02.20


コメント